Scheduling a Report to Export
Reports can be scheduled to save to a pre-set location on a one-time or recurring basis. The process is akin to scheduling a report to print automatically.
To schedule a report to export:
-
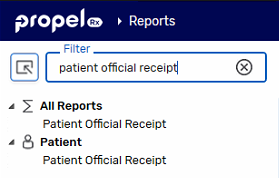
Dropdown the applicable header on the left and select the report.
Enter the report name in the Filter field and press Enter on your keyboard to quickly locate it.
-
Enter report criteria, if needed.
-
Select the Schedule action button at the bottom. The Schedule Report window opens.
-
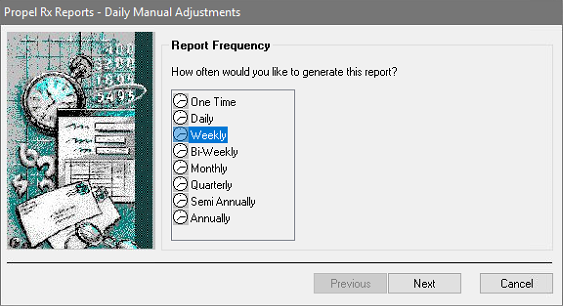
To specify the report frequency, highlight the frequency you want to generate the report and then select Next.
-
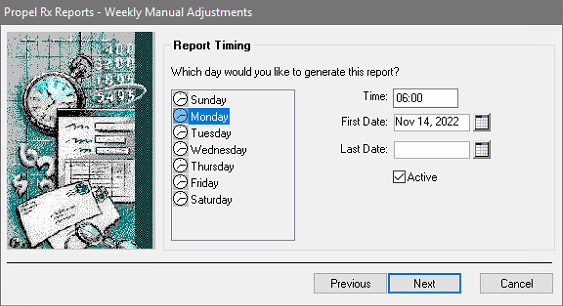
To specify the report timing:
-
If generating a Weekly, Bi-Weekly, or Monthly report, select a day on the left hand side.
-
If required, change the Time.
-
Enter the Start Date that the report will be generated. If generating a One Time report, select the Run Date for the report.
-
Optional: Enter the End Date for the report.
Once the End Date is reached, the report will remain in the Scheduled Reports list with an Expired indicator.
Select Next.
-
-
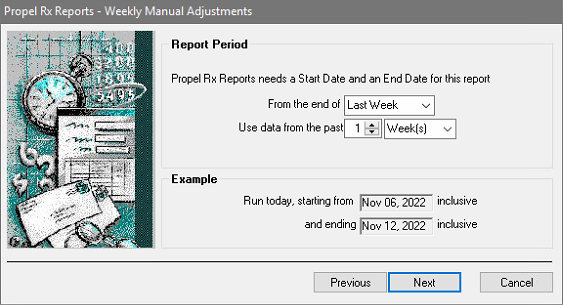
Some reports will require a report period to be specified. Make selections from the dropdown lists to choose a report period and then select Next.
-
If desired, update the Report Name.
-
Choose where the report will be saved:
-
Select To a file in the Report Output section.
-
Select the Save as button. The Save File As window opens.
-
Select a file location in which to save the report.
-
Select the file type from Save as type (CSV with Headers is recommended).

-
Select Save.
-
Select the Include date in file name checkbox if you don't want the report to be overwritten with each generation.
-
-
Some reports provide the ability to set custom Sort and Filter options. Enter these options if required.
-
Select Next.
-
Review the information in the Report Confirmation window.
If you want to make changes, select Previous to return to previous windows and make changes.
-
Select Finish.